If you want to keep your computer functioning properly, you need to ensure all the drivers are up to date. The newest driver versions will ensure that the hardware works properly without any problems or glitches.
Updating the wireless drivers is also important, but how to update WiFi drivers if you only have a basic understanding of hardware and software components?
No worries; we will give you a detailed guide on the process, depending on your device and operating system. By the time you’re done, you will even want to update all other drivers on your device. Thus, let’s get started!

How to Update WiFi Drivers
When it’s time to update WiFi drivers, how you do it depends on your device and operating system. It doesn’t matter if you’re running Windows, Mac, or Linux; they all have different approaches to updating WiFi drivers. Many times, the WiFi card manufacturer is also a thing to consider.
In the following section, we will cover all the methods you can use to update your drivers, depending on your device’s hardware, operating system, and also your knowledge of software and programs.
Updating WiFi Drivers According to the Operating System
Update WiFi drivers on Windows
There are three ways to update the WiFi drivers on a Windows device:
Manual update
By manual update, we mean you have to download the official software files from the network card manufacturer directly on your device and install them.
Broadcom, Atheros, and Intel are the three major wireless/LAN card manufacturers. Downloading the proper drivers depends on your device’s WiFi card manufacturer. To update your device’s WiFi drivers manually, you need to do the following:
- Find the manufacturer of your WiFi card by looking in the “Device Manager” or physically finding it on the card itself.
- Visit the official webpage of the manufacturer and search for the drivers according to the card model.
- Download the newest version of the drivers and proceed with the installation.
- Restart your PC after performing the update.
Update using the Device Manager
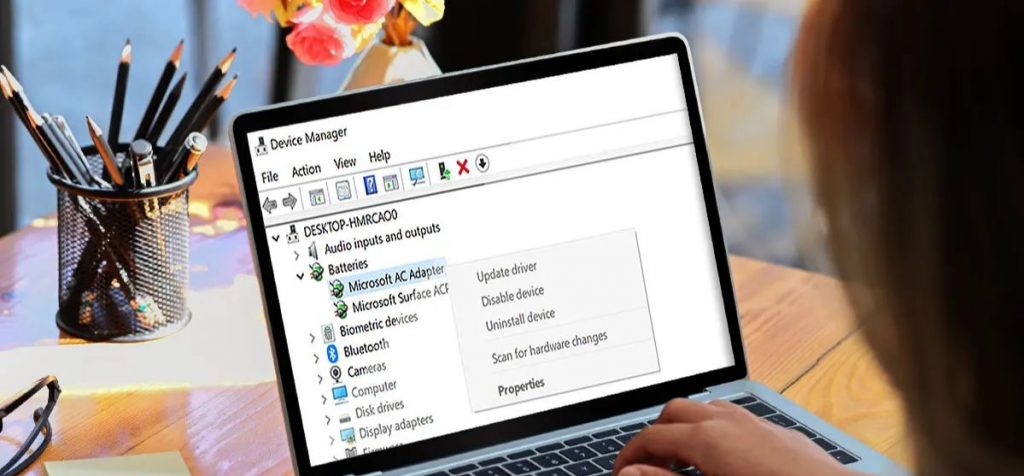
Updating WiFi drivers can also be done through the Windows Device Manager utility. The Device Manager is where you can see all the hardware your system consists of and manipulate its drivers and settings. To perform an update of your WiFi drivers using Device Manager, you should follow these steps:
- Press “Windows + X” together and select “Device Manager” from the list.
- Once you access the Device Manager window, search for the “Network Adapters” tab and click the arrow next to the name to expand it.
- Choose the name of your WiFi network adapter and right-click on it, selecting the “Update Driver” option.
- You will be asked whether you can provide installation files or let “Windows Update” search for them automatically.
- Choose the latter option, and let Windows update your WiFi drivers automatically.
Update using a dedicated app
An even easier way to update your WiFi drivers is by using a third-party application. There are many applications for this purpose, some of the best being System Mechanic Ultimate, DriverFix, AVG Driver Updater, Driver Easy, Driver Talent, etc.
Whichever program you choose will be able to get the job done. The entire process is automatic, as it will locate the version of the current WiFi driver, uninstall it and then reinstall the newest version according to the manufacturer.
Read More: How to Control Devices Connected to Your WiFi

Update WiFi drivers on Mac
The WiFi driver update process on a Mac device is straightforward since all the device’s hardware is automatically downloaded and updated. However, if you wish to do it manually, follow these steps:
- Click on the “Apple” logo in the top-left corner of the screen.
- From the drop-down menu, select “System Preferences”.
- Now choose “Software Updates” and click the “Update Now” button to check and install new updates if they are available.
- Check the “Automatically keep my Mac up to date” box to make your device perform regular updates by itself.
Update WiFi drivers on Linux
Even though similar to Mac, the Linux WiFi drivers are also updated automatically; you can also update them manually in two ways:
By using the Terminal
With the Terminal, you can perform a full manual update of all the drivers, including the WiFi card drivers. Do this by following these steps:
- Access the Terminal by using the shortcut “CTRL+ALT+T”.
- Type the “sudo apt-get update” command and press “Enter”.
- The system will ask you to submit your user password, after which it will start updating the software files.
- Once the software files are ready, enter the “sudo apt-get upgrade” command and press “Enter” to initialize the update process.
- The device will then proceed to install and update all of the necessary drivers.
By using the Additional Drivers Tool
If you want a simpler way, you can use the Additional Drivers Tool to perform an update of your Linux WiFi drivers. This approach is more intuitive and better suited if you don’t want to bother with Terminal commands. All you need to do is:
- Search for the “Additional Drivers Tool” and open it.
- Once the application starts, it will scan the system and search for newer versions of the drivers online.
- When it completes the search, it will list any new WiFi drivers if they are available.
- Select the drivers you wish to update and click the “Apply Changes” button to complete the update process.
Conclusion
As you can see, how to update WiFi drivers depends on your device and operating system. All the ways to update the drivers have different approaches, and not two of them are the same.
Make sure you fully comprehend the instructions we provided before updating and altering anything concerning operating system drivers.
They are the link between the software and the hardware in the system, and if these files get corrupted, the device will start to misbehave and not function properly.